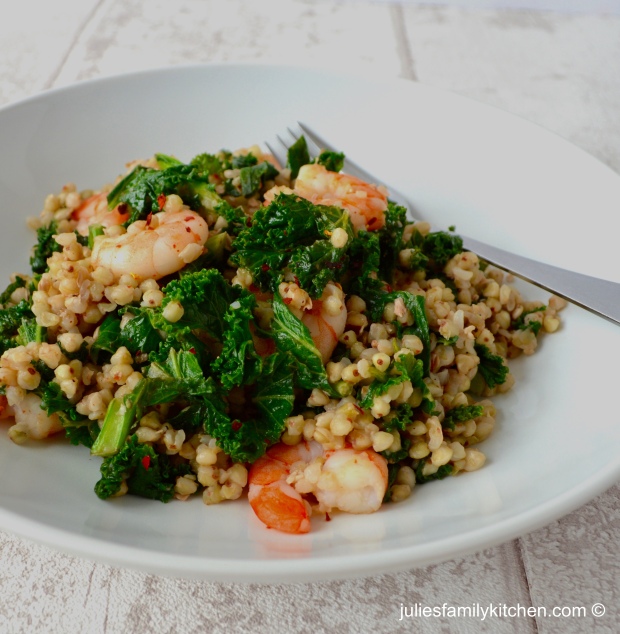
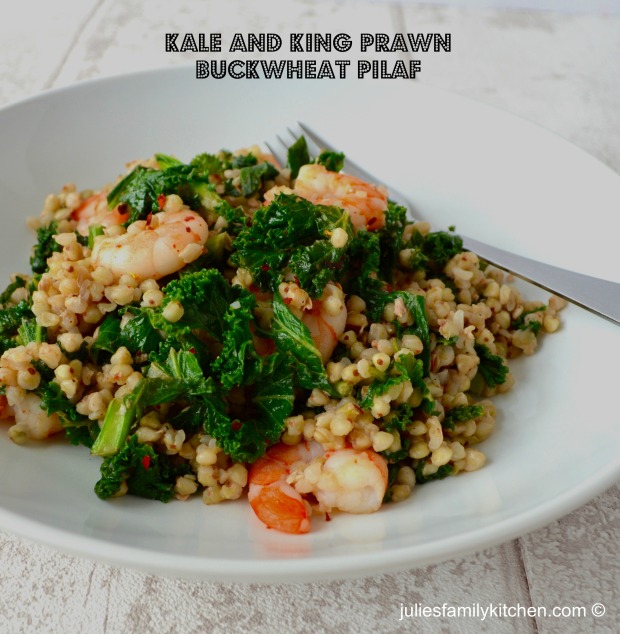
Kale and King Prawn Buckwheat Pilaf

Kale and Prawn Buckwheat Pilaf

Absolutely inspired by a new book cookbook I recently reviewed titled Grains as Mains I threw together this delicious Kale and King Prawn Pilaf for lunch earlier in the week. Ancient grains and seeds are currently enjoying somewhat of a reniassance at the moment probably because they taste great with the added benefit of being very nutritious too. Some ancient grains and seeds such as buckwheat, quinoa, teff, amaranth and millet are gluten free, so they are a fantastic alternative for those who are gluten intolerant.

I’ve not until now used buckwheat before but I’m now totally hooked. Buckwheat is a triangular shape shape seed related to sorrel and rhubarb, originating from Asia. It has a nutty taste and is one of the healthiest of the ancient grains and seeds.

I’ve teamed the buckwheat with nutrient rich kale and juicy king prawns, along with a pinch of chilli flakes and a good squeeze of lemon juice making it a real mouth watering meal. It’s a simple and quick recipe that I think you’ll enjoy.

Kale and King Prawn Buckwheat Pilaf

  • Servings: 1
  • Difficulty: easy
  • Print

IngredientsKale and Prawn Buckwheat Pilaf

70g buckwheat
1tsp olive oil
40g kale
75g cooked king prawns
a pinch of dried chilli flakes
a generous squeeze of lemon
salt and pepper

Method

1. Place the buckwheat in a sieve and rinse through with water.

2. Transfer the buckwheat to a small saucepan and add 150ml cold water, bring to the boil then simmer for approximately 8 minutes. Remove from the heat and allow the buckwheat to soak up any excess water.

3. Heat the olive oil in a pan. Add the kale, king prawns, a good pinch of chilli flakes and a generous squeeze of lemon juice. Season well with salt and pepper.

4. Once the kale has wilted add the cooked buckwheat to the pan and heat through for a minute or so. Serve immediately and enjoy!

Recipe by Julie McPherson

Kale and Prawn Buckwheat Pilaf

If my kale and king prawn buckwheat pilaf is your kind of food, then don’t forget to check out my giveaway and review of Grains as Mains by Laura Agar Wilson, a cookbook featuring modern recipes using ancient grains.

Until next time.

Julie
x

White Chocolate and Vanilla Layer Cake

White Chocolate and Vanilla Layer Cake

The lovely folks at Baking Mad recently asked me to try out one of their gorgeous recipes, a Victoria Sponge Cake recipe. However this is no ordinary Victoria sponge with layers of white chocolate sponge, white chocolate and vanilla ganache plus raspberry jam it really is a showstopper cake. Ideally, I would have decorated my cake with raspberries too but having run out of them I thought strawberries would work equally well.

Of course, this is not an everyday cake but one I would make for a special occasion like a birthday as it tastes so rich and indulgent. My girls were completely wowed by the finished cake and somewhat chuffed that they were getting the chance to eat it. White chocolate, vanilla and raspberry are beautiful flavours that work well together making this Victoria sponge cake utterly delicious.

White Chocolate and Vanilla Layer Cake

The recipe uses Nielsen Massey Vanilla Bean Paste, an ingredient that I’ve never used before as I’ve always stuck to using their pure vanilla extract. The vanilla bean paste actually contains the vanilla pods whereas the extract doesn’t. I really liked the Nielsen Massey vanilla bean paste (it smells incredible!), it’s most certainly an ingredient I’ll use much more in my baking.

White Chocolate and Vanilla Layer Cake

So, if you fancy having a go at making this delectable cake you can find the recipe and lots more baking recipes and ideas for everyday and special holidays such as Easter and Christmas on the Baking Mad website.

Until next time, happy baking.

Julie
x

Disclosure: I have not been paid or sponsored to write this blog post. Baking Mad sent me some ingredients to try out one of their recipes. All opinions are honest and my own.

Gnocchetti Sardi Pasta with Parma Ham, Rocket and Tomatoes

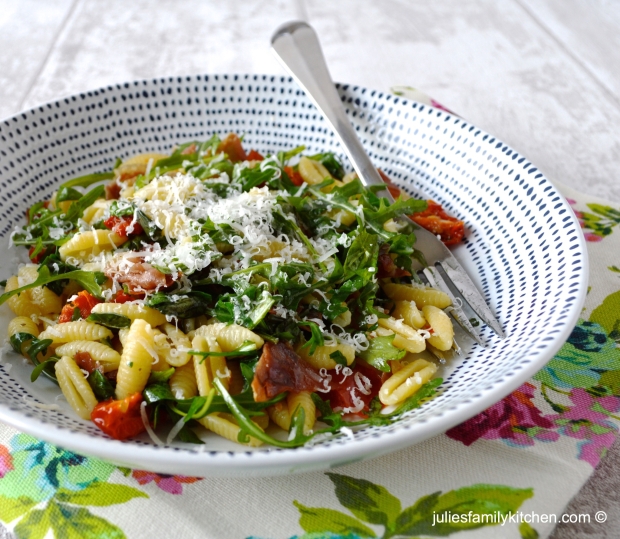
Gnocchetti Sardi Pasta with Parma Ham, Rocket and Tomatoes

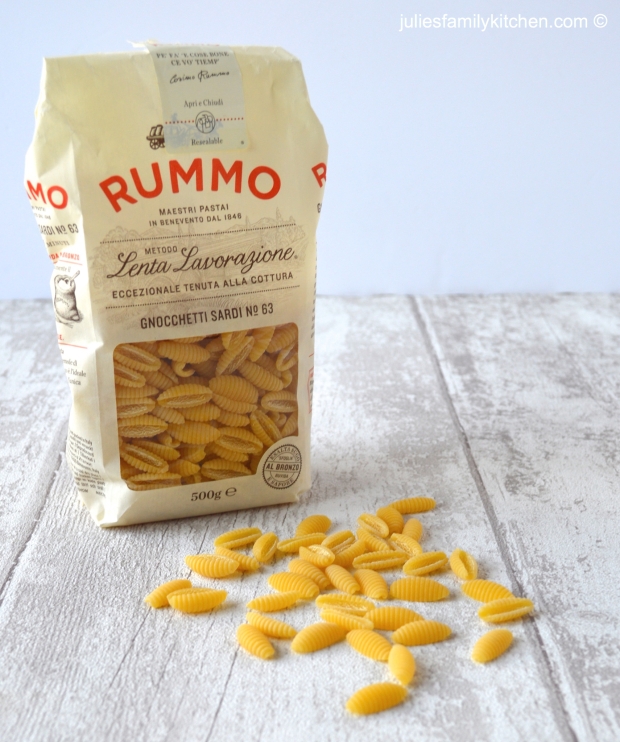
It has been a while since I’ve found an unusual pasta shape to cook with. I recently discovered the Gnocchetti Sardi pasta shape in Valentina Fine Foods, an Italian restaurant deli and have been itching to try it out in a new recipe.

After doing a little research online I discovered that this small tightly curved pasta with a ridged exterior is from Sardinia and was traditionally made by pressing the pasta dough onto the bottom of a wicker basket. Gnocchetti Sardi is also known as Malloreddus.

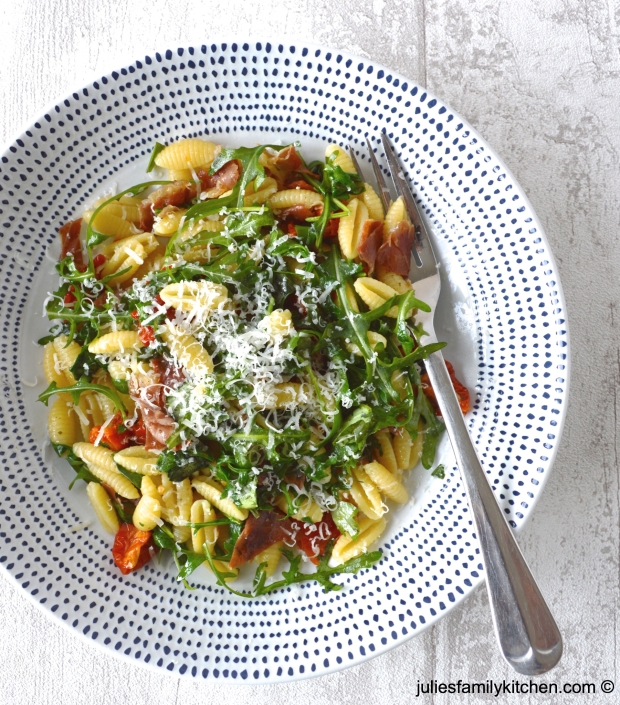
Gnocchetti Sardi with Parma Ham, Rocket and Tomatoes

This incredibly easy pasta dish takes no time at all to prepare and makes a delicious lunchtime meal. I adore the vibrancy and punchy flavours from the rocket (arugula), basil, Parma ham and semi dried tomatoes, not forgetting the salty Parmesan cheese which seems to bring everything together. I ate my pasta whilst still warm but I think it would work equally well cold as a pasta salad ideal for a picnic.

Gnocchetti Sardi with Parma Ham, Rocket and Tomatoes

Gnocchetti Sardi Pasta with Parma Ham, Rocket and Tomatoes

  • Servings: 1
  • Difficulty: easy
  • Print

IngredientsGnocchetti with Parma Ham and Tomatoes

75g Gnocchetti Sardi pasta
1 tsp olive oil
2 slices Parma ham
50g semi dried tomatoes in olive oil
a handful of rocket (arugula)
a handful of basil
grated Parmigiano-Reggiano (Parmesan) cheese

Method

1. Cook the pasta in a saucepan of salted boiling water until al dente (11 minutes approximately).

2. Meanwhile heat the olive oil in a frying pan. Using a pair of scissors trim off the excess fat from the Parma ham and cut into bite size pieces, . Sauté the Parma ham in the oil until beginning to crisp.

3. Chop the basil and semi dried tomatoes into bite size pieces.

3. Drain the pasta and add to the Parma ham along with the semi dried tomatoes pieces. Warm through for about 30 seconds or so.

4. Off the heat stir in the rocket (arugula) and basil. Serve immediately with lots of grated Parmesan cheese on top. Enjoy!

Recipe by Julie McPherson

Gnocchetti Sardi with Parma Ham, Rocket and Tomatoes

If you are lucky enough to have an Italian deli nearby, I absolutely recommend you pay it a visit. Italian deli’s are fantastic places for tracking down a wide variety of pasta types, as well as cheeses, meats and breads.

Until next time.

Julie
x

Link up your recipe of the week
Tasty Tuesdays on HonestMum.com

Kenwood kMix Creaming Beater (AX500) Review

Kenwood kMix Creaming Beater

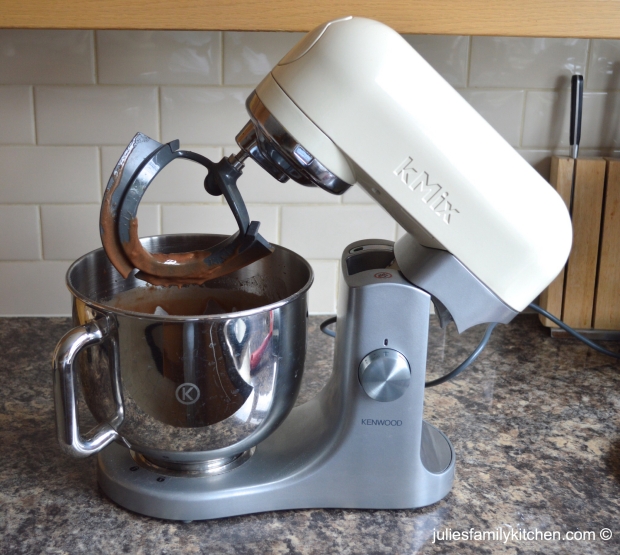
I’ve owned my Kenwood kMix stand mixer for almost three and half years and I absolutely love it. The kMix standing mixer is a dream to use in the kitchen and I wouldn’t be without it now. I recently read in a magazine about the Kenwood creaming beater and how it would reduce the frustrating need of scraping round the mixing bowl. Thank goodness for silicone spatulas!

After finding an online supplier I ordered the AX500 creaming beater which fits the kMix, although do be careful not to accidentally buy the attachment for the Kenwood Chef instead. Online retailers are selling the AX500 from £19.99 upwards plus postage, so it’s worth shopping around.

Kenwood kMix Creaming Beater

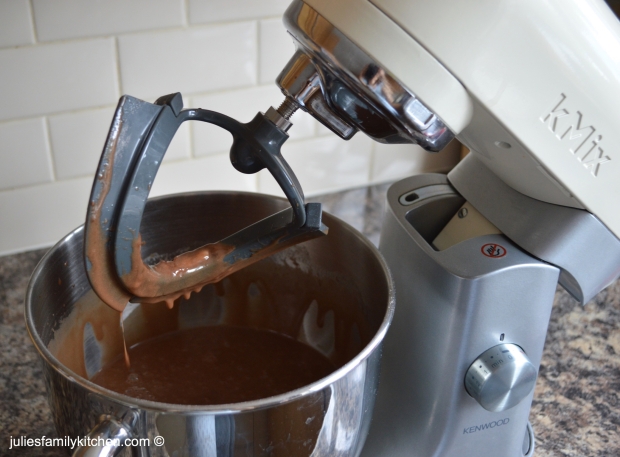
I had high hopes for this new attachment as up until now the I’ve only used the K beater for making cakes, cookies and buttercream. I’m honestly really impressed with the AX500 creaming beater. It has a rubber wiper that skims the inside edge of the bowl ensuring the mixture is well mixed and does most definitely stop the need for scrapping round the bowl. I found that there was only a tiny amount of flour attached to the rubber wiper after my cake batter had been beaten. So that was a huge improvement.

I believe new kMix stand mixers now come with the creaming beater but if like me you have an older model and don’t have one, it is definitely worth the investment.

Until next time.

Julie
x
Disclosure: This review has been written because I wanted to share my experience, I bought the AX500 myself. This review has been carried out independently of Kenwood. All opinions are honest and my own.

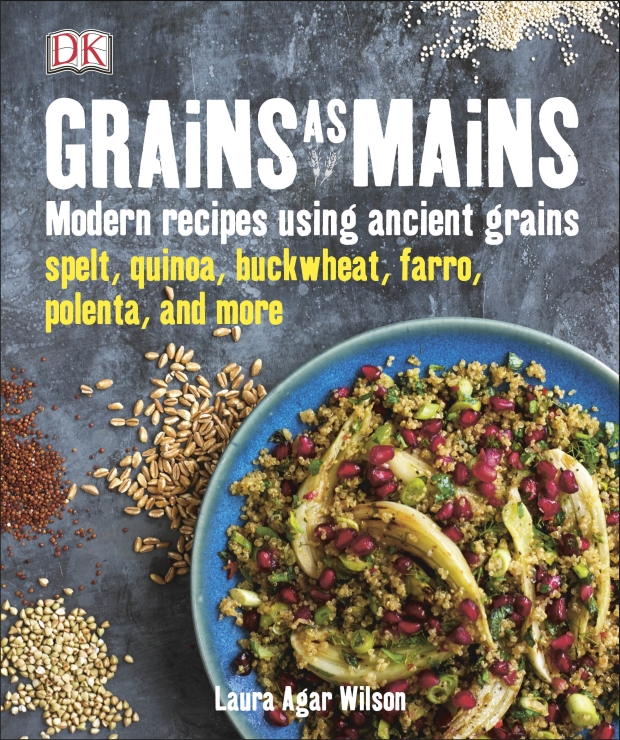
Grains as Mains by Laura Agar Wilson Cookbook Review and Giveaway

Grains as Mains

I was very excited about reviewing Grains as Mains by Laura Agar Wilson, a cookbook recently published by DK books that focuses on using ancient grains such as spelt, quinoa, buckwheat and farro in modern recipes. The term ancient grains refers to grains and seeds that are virtually the same as those used by the earliest civilisations. Interesting, these ancient grains are tasty and nutritious, plus some are gluten free too.

Grains as Mains contains at a glance information about these grains and seeds, followed by preparation and cooking techniques. There is an amazing selection of delicious looking recipes each incorporating an ancient grain as a substantial component of the dish.

Grains as Mains

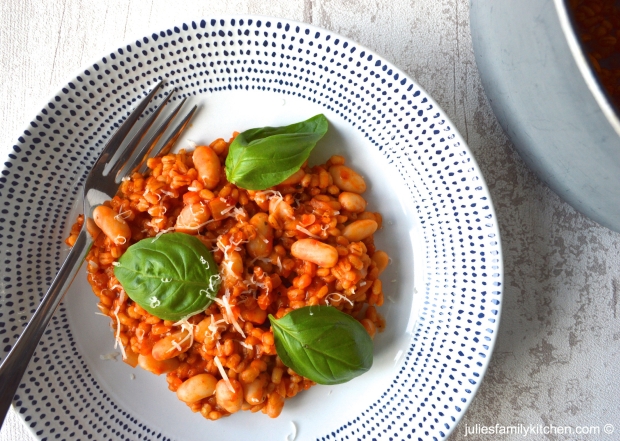
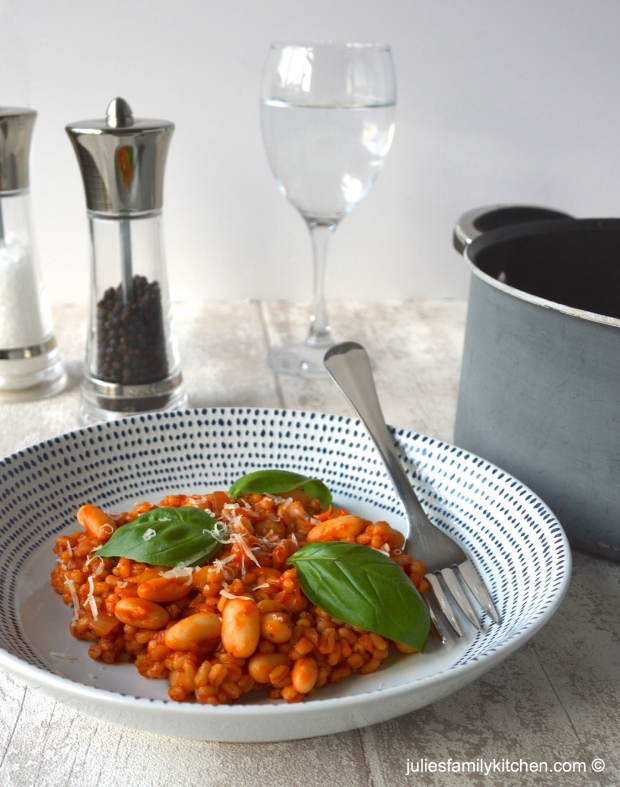
For the purposes of this review I decided to test the Italian Tomato Barley Risotto recipe. I really like a risotto and quite often choose one if eating out. However, a traditional risotto recipe does require a certain amount of time and patience to prepare, the recipe I selected appealed because of its simplicity and lack of hovering over the hob.

Grains as Mains

I was extremely impressed with the taste and texture of the barley risotto. I can definitely see me making this recipe again and using it as inspiration for my own recipes in the future. What I particularly liked about this book is that it has really got me thinking about ingredients that I would not normally use. With this in mind, I’m planning on experimenting in the future as well as trying out lots more recipes from this fabulous book.

To be in with a chance of winning a copy of Grains as Mains by Laura Agar Wilson (RRP £16.99) you will need to complete the Rafflecopter entry form and provide an answer to the giveaway question as a blog comment. (Leaving a blog comment is mandatory, so please follow this requirement to ensure your entry is valid). Once, you have done that there are further chances to win.

Click here to enter the giveaway

Grains as Mains

The giveaway will close at 00:00 on 4 May 2015 and is open to UK entrants only.

I wish you all the very best of luck.

Julie
x

Terms and Conditions:
This giveaway will close at 00:00 on 4 May 2015. Leaving a blog post comment is a mandatory entry option. This prize is offered by Dorling Kindersley Ltd (DK) and I am hosting it on behalf of them. Please note, I am not responsible for posting the prize out or providing it. DK or their representative will send out the prize within 14 days of the winner providing me with their name and address. The winner will be selected at random from all correct entries received by the Rafflecopter widget. The winner will be notified within 7 days of the closing date. The prize is as stated, a copy of Grains as Mains by Laura Agar Wilson, no cash alternatives are available. This giveaway is open to UK entrants only.

Disclosure:
Dorling Kindersley Ltd (DK) are kindly offering the prize to one lucky reader. I received a copy of Grains as Mains to review. I have not been sponsored or paid to host this giveaway. All opinions are honest and my own.

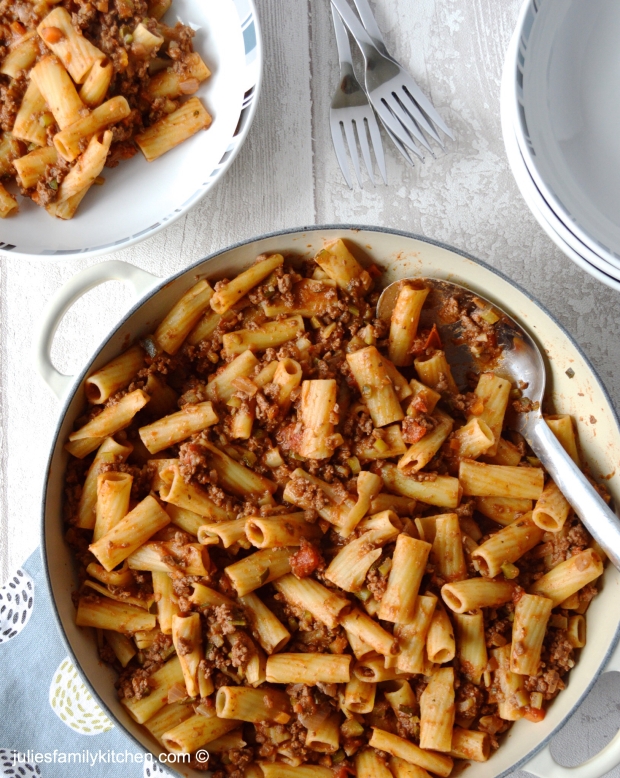
Rigatoni Beef Bolognese

Rigatoni Beef Bolognese

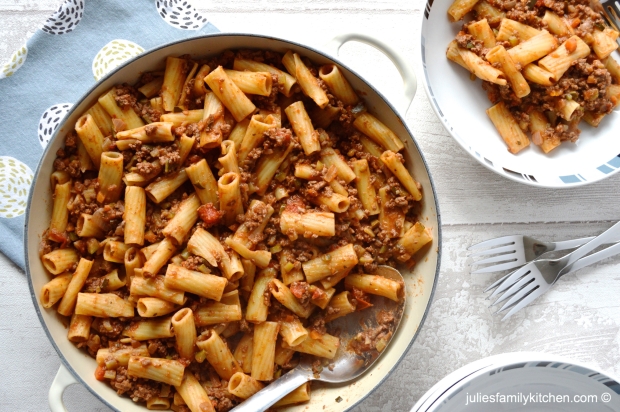
I’ve been making my own version of a beef bolognese sauce for a little while now. I’m not pretending it’s authentic but it tastes really good and I know that it’s much healthier than the jars of bolognese sauce you buy in the shops.

With three children and a husband to feed, sometimes I like to prepare the evening meal earlier in the day when the children are at school The bolognese sauce keeps and reheats well, so all I need to do is cook up a fresh batch of pasta. The great thing about this recipe is that it’s ideal for sneaking in a few more veggies. This time I’ve added finely diced courgette but sometimes I add sliced mushrooms instead. Hubby likes his bolognese with a bit of heat so I usually add a sprinkling of dried chilli flakes to our meal but keep the children’s meal chilli free. Sometimes, I add a teaspoon of balsamic vinegar to the sauce but that’s completely up to you.

Rigatoni Beef Bolognese

Rigatoni Beef Bolognese

  • Servings: 4-6
  • Difficulty: easy
  • Print

IngredientsRigatoni Beef Bolognese

1 onions
1 carrot
2 small sticks of celery or 1 large
1 courgette
1 tablespoon olive oil
500g mince beef (5% fat)
180ml red wine (I use a mini bottle of Merlot or Shiraz)
150ml passata
400g chopped tinned tomatoes
1 teaspoon dried oregano
1 teaspoon balsamic vinegar (optional)
Salt and black pepper
400g rigatoni pasta
Parmesan cheese to serve

Method

1. Heat the olive oil in a large lidded casserole pan. Finely dice the onion, carrot, celery and courgette then sauté in the oil until beginning to soften this will take 10 to 15 minutes.

2. Add the mince beef to the pan and brown all over.

3. Add the wine and bring the bolognese to the boil, keep on a high heat for 5 minutes stirring frequently.

4. Then, add the chopped tomatoes, passata, balsamic vinegar (if using) and oregano. Season well with salt and black pepper. Bring to the boil, then simmer with the lid partially on for 1 hour or longer if possible. Stir every so often to check it’s not catching on the bottom of the pan.

5. Meanwhile, cook the rigatoni pasta in a large saucepan of salted boiling water until al dente.

6. Drain the pasta and add to the casserole pan of bolognese sauce with a little of the pasta cooking water, stir on the heat to combine. Serve with grated Parmesan cheese. Enjoy!

Recipe by Julie McPherson

Rigatoni Beef Bolognese

Rigatoni Beef Bolognese

Hope you all are having a lovely Easter holiday with friends and family.

Until next time.

Julie
x
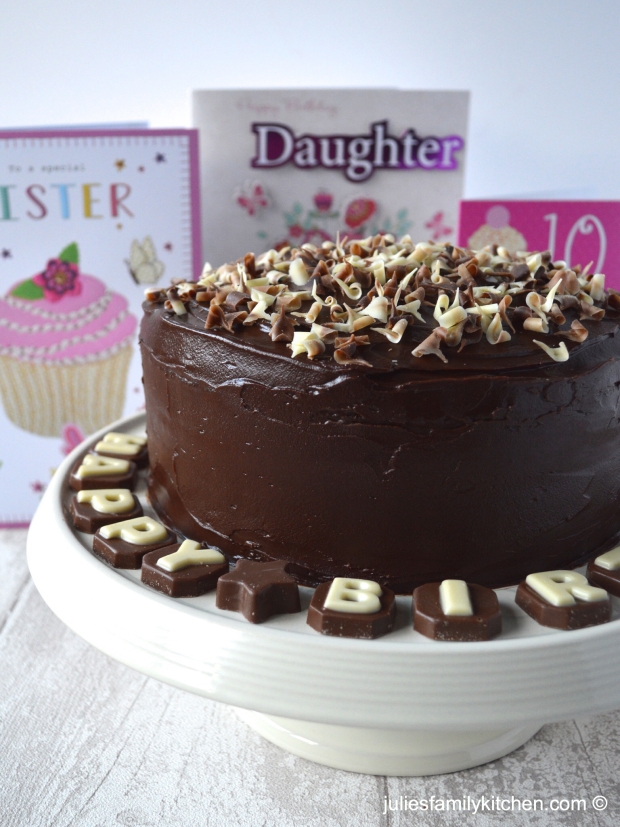
Death by Chocolate Cake

Chocolate birthday cake

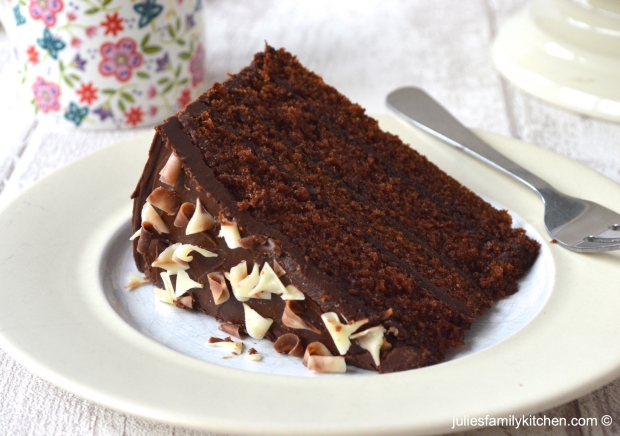
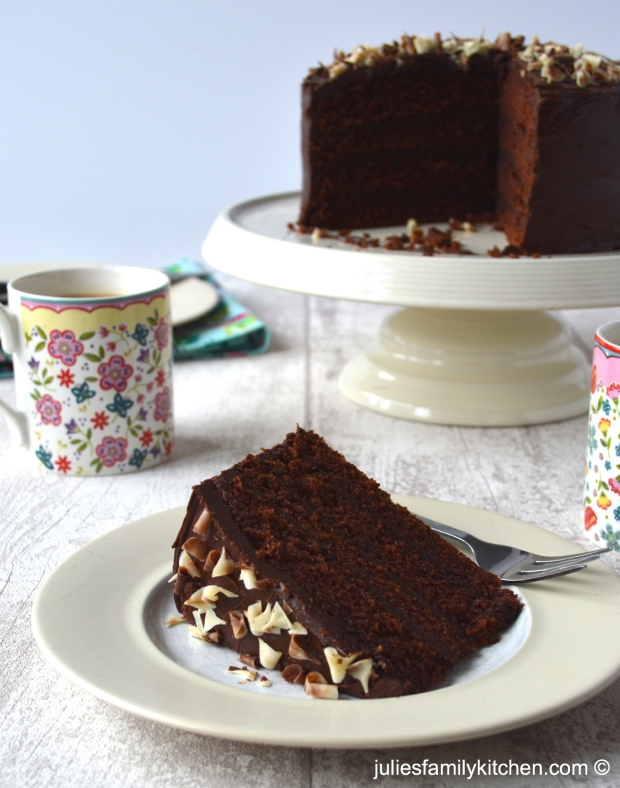
Death by Chocolate Cake is a super indulgent chocolate cake recipe from Mary Berry’s Baking Bible. The name itself is enough to suggest that this is one seriously chocolately cake and I have to agree. I decided that this chocolate cake would make the perfect birthday cake for my daughter’s 10th birthday. The chocolate sponge is incredibly moist but would benefit from a bit more cocoa powder or maybe a little less golden syrup. However, the chocolate icing is amazing and the recipe is so easy I would definitely make it again but would tweak it slightly. If you follow me on Instagram you would have seen the cake in the making.

Chocolate birthday cake

Maybe I was mad but to celebrate my daughter’s big day I organised roller skating followed by pizza for her and her friends. What a crazy afternoon that was! I was completely shattered afterwards but my birthday girl had a fabulous time and loved her chocolatey birthday cake too.

Chocolate birthday cake

Until next time.

Julie
x
Sunshine Fruit Smoothie

Sunshine Fruit Smoothie

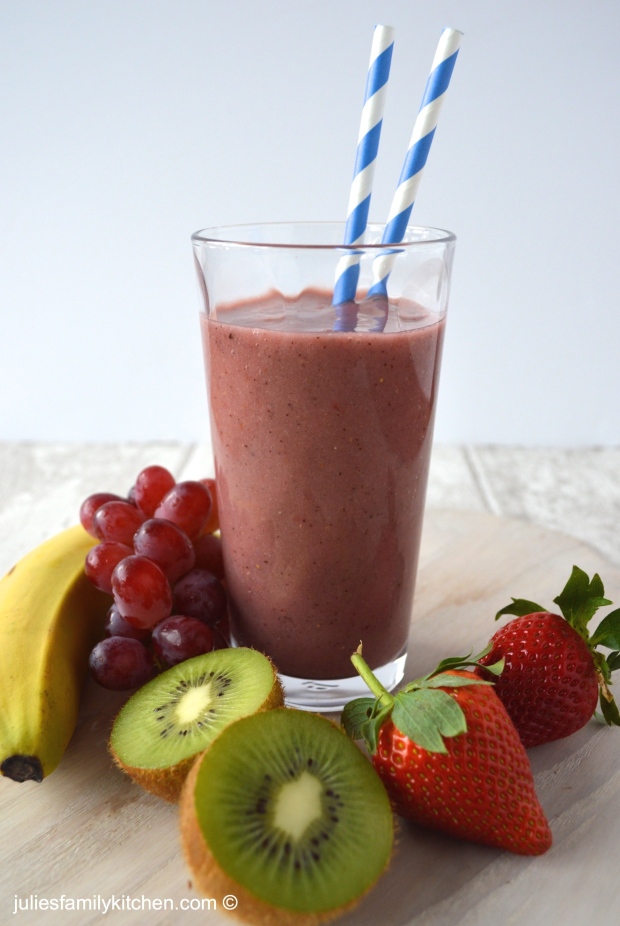
Bursting with kiwi, banana, strawberries and red grape juice I think you’ll love this sweet sunshine fruit smoothie recipe. Smoothies are a brilliant way of getting your five a day, especially if like me you are not a big fruit eater. Now I know fruit juices are getting lots of bad press due to the high level of naturally occurring sugars, if this is something you’re concerned about then a good way to reduce the impact here is to dilute the red grape juice with water. Either way, this really is a delicious fruit smoothie.

Sunshine Fruit Smoothie

  • Servings: 1
  • Difficulty: easy
  • Print

IngredientsSunshine Fruit Smoothie

1 medium banana
1 kiwi
2 large strawberries
100ml red grape juice

Method

1. Peel and chop the fruit and place in a blender.

2. Add the red grape juice, then blitz until smooth. Enjoy straight away!

I’ve not delved into the world of vegetable smoothies and juices yet, have you? I’m still unsure about it all. However, I recently picked up a copy of the Innocent Smoothies recipe book whilst browsing in an Oxfam bookshop, it was an absolute bargain at £1.99, I’m hoping it will give me lots more smoothie inspiration, possibly of the veggie kind too.

Until next time.

Julie
x
If you have enjoy reading my food blog, I would really appreciate it if you could take 2 minutes to nominate for me in the Brilliance in Blogging awards (food category) 2015. Thank you so much in advance and a virtual slice of cake is on its way to you. xxx

Brilliance in Blogging Nomination Form

BritMums

Stellar Tate Stackable Draining Saucepan Review

Stellar Tate draining saucepan

I was delighted to receive a Stellar Tate 18cm stackable draining saucepan to review recently, knowing full well that I would get plenty of use out of it. Cooking and preparing food is a big part of my life with 3 growing children and a husband to feed. I really enjoy cooking a roast on a Sunday and find that it’s one meal that seems to require lots of saucepans.

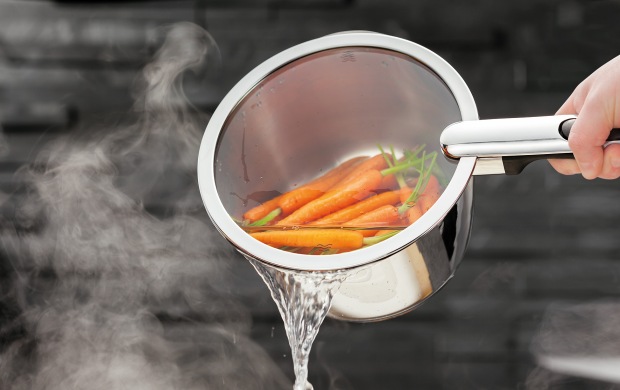
The new range of cookware from Stellar includes draining casseroles in 20/22/24cm and draining saucepans in 16/18/20cm. As you can see from the images the sleek lid is what makes the cookware stackable, saving you space in your kitchen. I particularly like the shiny stainless steel exterior which complements the rest of my saucepans perfectly.

The winning design aspect for me has to be the unique draining lid, there’s no need to use a colander as all the cooking water drains away with ease. The inside of the saucepans are marked with measurements, such a clever idea and very useful if making sauces or custard. Plus the Stellar Tate range is suitable for all types of hobs and includes a lifetime guarantee.

In my view the Stellar Tate stackable draining saucepans and casseroles would make a stylish and practical addition to any kitchen.

Until next time.

Julie
x
Disclose: I was sent a Stellar Tate 18cm stackable draining saucepan to review. I have not been paid or sponsored for this review. All opinions are honest and my own.

Extremely Chocolatey Easter Cupcakes

Extremely Chocolatey Easter Cupcakes

Last year I baked these extremely chocolatey and utterly delicious Easter bird nest inspired cupcakes, with the Easter holidays not far away I wanted to share them with you again (just in case you missed them!). The cupcakes bases are a moist chocolate sponge, topped with chocolate buttercream and a layer of flaked chocolate to resemble a nest then finally finished off with Cadbury’s Mini Eggs. Chocolate and more chocolate, what’s not to like about these Extremely Chocolatey Easter Cupcakes?

Don’t be put off by the length of this recipe, it is actually relatively quick as the sponge cupcakes are made using the all in one method.

Extremely Chocolatey Easter Cupcakes

Extremely Chocolatey Easter Cupcakes

Extremely Chocolatey Easter Cupcakes

  • Servings: 12
  • Difficulty: easy
  • Print

IngredientsExtremely Chocolatey Easter Cupcakes

Chocolate sponge cupcakes

160g unsalted butter (very soft)
160g golden caster sugar
2 large eggs
130g self raising flour
30g cocoa powder
2 tablespoon milk
1/2 teaspoon baking powder

Chocolate Buttercream

100g dark chocolate (54% cocoa solids)
100g unsalted butter (very soft)
200g icing sugar (sifted)
1 tablespoon milk

Decoration

1 bag of Cadbury’s Mini Eggs
8 small or 4 regular size Cadbury’s Flakes
Creme Eggs and little furry chicks not compulsory but totally cute

Method

1. Pre heat your oven to 160c Fan (180c)

2. Line a 12 hole muffin tin with muffin cases.

3. Put all the cupcake ingredients in the mixing bowl and beat well until the all the mixture is fully combined.

4. Using two dessert spoons, spoon the cake mixture into the cases and bake for 25 minutes until springy to touch.

5. Leave the cakes in the tin for 5 minutes then transfer to a wire rack to cool completely.

6. To make the buttercream begin by melting the chocolate over a bain-marie or in the microwave until fully melted, then allow to cool.

7. In a mixing bowl beat the butter and icing sugar together, then add the melted chocolate and beat again, then finally beat in the milk.

8. In a bowl crumble the flakes.

9. Using a palette knife spread each cake one at a time with the chocolate buttercream and then dip the cakes in the chocolate flakes (to create the bird nest effect).

10. Then top with 2 or 3 mini eggs. Enjoy!

Extremely Chocolatey Easter Cupcakes

Extremely Chocolatey Easter Cupcakes

Until next time, happy Easter baking.

Julie
x

It’s that time of year again when bloggers go a bit crazy asking for nominations in the Brilliance in Blogging (BiB) awards. Last year Julie’s Family Kitchen was short listed but unfortunately didn’t make the final. So, if you have enjoyed reading my foodie blog I would really really appreciate it if you could take 2 minutes to nominate for me in the Brilliance in Blogging awards (food category) 2015. Thank you so much and a virtual slice of cake is on its way to you. xxx

Brilliance in Blogging Nomination Form

BritMums
Tasty Tuesdays on HonestMum.com